Advertisement
Home Page 5548

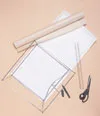
Woven cane shades

NOTE: To ensure safety, use only 25W light globes in each of the lamps featured here.

Materials Drum shaped wire frame (available at selected craft and hobby outlets)

Cane webbing for chairs, appox. 65cm (available from chair repair shops)

Scissors

Masking tape

PVA glue

Clothes pegs

Craft glue

Bias binding, in a colour that matches the cane webbing

Towel

Step 1

Measure the length and circumference of the lamp, then make a paper template of it, Be careful to allow and extra 2cm at the top edge and on one edge where the lamp panel will meet and overlap. Transfer the template markings to the back of the cane webbing and mark the top cutting line with masking tape. (The webbing comes with fringed raw edges on both sides. Leave the fringing on the edge that will form the bottom of your shade.) Soak the webbing in warm water for about 15 minutes. This makes it easy to bend and should prevent splitting. Remove the webbing from the water and pat it dry with a towel.

Step 2

Apply a thin line of PVA glue along the top edge of the wire frame and begin pressing the top edge of the webbing to it. Fold the 2cm allowance to the inside of lamp as you work and peg this in place while the glue is drying. Work until the webbing is completely attached, then apply a thin line of glue around the bottom edge of the frame and secure the lower edge of the webbing in place. Apply a thin line of glue between the two layers of the webbing where the sides overlap. Neaten the inside top edge by applying bias binding over the folded edge, and then glue it in place to secure it.

Credit: Lampshades designed and made by Ivana Perkins

Related stories


Advertisement
Home Page 5548

Feathered shade

NOTE: To ensure safety, use only 25W light globes in each of the lamps featured here.

Materials

Plain lampshade

Feather boa, in desired shade

Spray adhesive

Apply the spray adhesive all around the outside of the lampshade, and then, working quickly and starting at the top of the shade, wind the feather boa around the shade until the surface is covered. Press the boa in place firmly on the surface of the shade. When you are happy with the shape, trim the top rim of the feathers so none of them touches the light bulb or is inside the shade.

Credit: Lampshades designed and made by Ivana Perkins

Related stories


Advertisement
Home Page 5548

Paper shade

NOTE: To ensure safety, use only 25W light globes in each of the lamps featured here.

Materials

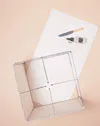
Wire box frame (available at selected craft and hobby outlets)

Japanese momigami double-sided paper or other handmade paper

Scissors

Masking tape

Craft glue

Blunt knife

Step 1

Measure the height and width of the frame to calculate the size of the paper sheets needed to cover it. Allow 2cm for top and bottom and allow for a 1cm overlap where the sides meet. (We used two sheets of paper 44cm x 68cm).

Apply masking tape to one 68cm edge of one sheet of paper and to one 44cm edge of the other sheet of paper. Cut each sheet of paper into 4cm-wide strips cutting from the edge opposite the masking tape close to the masking tape. Do not cut through the masking tape but leave the strips attached at this side.

By repeating this on both sheets you will eventually create two sheets of paper with a fringed effect.

Step 2

Lay the cut sheets of paper on a flat surface, one on top of the other. Align the edges and smooth out the strips. Begin weaving the strips on the top sheet through the strips on the bottom sheet. Each strip should be woven over and under repeatedly until the whole strip is woven. Continue working in this way until the strips are all woven together to form one large piece of paper with a double thickness. Adjust the strips to create good tension.

Step 3

To secure the woven paper around the frame, apply a thin line of glue along one upright of the frame. Place the paper on top, press it firmly in place then fold the allowance under and tuck the ends in using a blunt knife. Allow to dry. When dry, roll the frame over the paper, folding in the allowances on the top and bottom edges as you work. Adjust the tension of the paper on the frame where the sides meet and trim the strips as necessary to create a neat finish. Apply a little glue between the paper layers where the sides overlap and press these layers together firmly to secure them in place.

Credit: Lampshades designed and made by Ivana Perkins

Related stories


Advertisement
Home Page 5548

Panel shade

NOTE: To ensure safety, use only 25W light globes in each of the lamps featured here.

Materials

Medium-weight cardboard, or you could use a manila folder

Wire lamp frame (available at selected craft and hobby outlets)

Mulberry paper

Plain paper

Pencil

Scissors

Clothes pegs

Craft glue

Blunt knife

Lamp feet stoppers (or you can use beads)

Step 1

Make a template of one of the frame panels by laying the frame onto cardboard and tracing around the outside of the wire. Allow 2cm extra for the overlap at the top, bottom and sides of the panel. Make another template but without the 2cm allowances. Cut out the templates, then cut three paper panels from each template.

Step 2

Secure the larger paper panels onto the lamp, first attaching them to each alternate panel of the frame. Lay the paper over the wire frame, centre it and apply a thin line of glue along the wire uprights. Press the paper firmly onto the glue and fold under the side and bottom allowances to the inside of the lamp, tucking the ends in with a blunt knife. Use clothes pegs to hold the edges in place as the glue dries. Repeat to attach the remaining two larger paper panels.

Step 3

Attach a smaller paper panel to the frame by applying a thin line of the glue over the corresponding paper-covered uprights for that frame. Centre paper panels, then press paper firmly onto the glue. Adjust the tension of the paper panel before the glue dries. Repeat to attach the two remaining smaller panels in this way and allow to dry. Make diagonal cuts in top allowances, then fold to the inside of the lamp and glue them in place to neaten this edge. Allow to dry, and then add the lamp feet to bottom of frame.

Credit: Lampshades designed and made by Ivana Perkins

Feathered shade

Related stories


Advertisement
Home Page 5548

Milk jug cover

Beautiful crocheted jug covers and cloth edges never go out of style. As we receive so many requests from readers for this style of project we thought it was time to run a lovely tea story from our archives. There is even a crochet jug cover that comes complete with it’s own teacup decoration!

Materials One ball each Twilleys Twenty white crochet cotton and variegated crochet cotton

Twelve glass beads

One 0.75mm crochet hook

Craft Glue

Plastic thimble

Measurements

Approximately 20cm diameter (from point to point)

Method

Using hook and white cotton, make 10ch, join with sl st to form ring.

1st row. 4ch, 35dtr into ring, join with sl st in 4th ch.

2nd row. 5ch miss 1dtr, 1tr in next dtr, 2ch; rep from to end, join with sl st in 3rd of 5ch.

3rd row. 1 sl st in first sp, 3ch, 4tr in same sp, drop lp from hook, insert hook into back of 3rd ch, draw dropped lp through firmly (Bbl formed); 5ch, 5tr in next 5 sp, drop loop from hook, insert hook into back of 1st tr, draw dropped lp through (another Bbl formed); rep from ending with 2ch, 1tr into top of first Bbl.

4th row. 6ch, 1dc in next lp; rep from ending with 3ch, 1tr into tr of previous row.

5th row. 7ch, 1dc in next lp; rep from all around, edning with 3ch, 1dtr into tr of previous row.

6th row. 7ch, 1dc in next lp, 11dtr in next lp, 1dc in next lp; rep from , omitting 1dc at end of last rep, 1sl st in dtr of previous row.

7th row. 1 sl st to centre of next lp, 1dc in same lp, 7ch, 1dc in next dtr, (2ch, miss 1dtr, 1dc in next dtr) 5 times, 7ch, 1dc in next lp; rep from ending last rep with 3ch, 1dtr in first dc.

8th row. 7ch, 1dc in next lp, 7ch (1Bbl in next 2ch lp, 2ch) 4 times, 1Bbl in next 2ch lp, (7ch, 1dc in next lp) twice; rep from omitting (7ch, 1dc) twice at end of last rep, 3ch, 1dtr in dtr of previous row.

9th and 10th rows. As 8th row, having 1Bbl less of each pineapple and 1 lp more between each row (3Bbls and 5 lps on 10th row).

11th row. (7ch, 1dc) in next 4 lps, 4ch, 2dtr into 2ch lp, 4ch, 2dtr in next 2ch lp, 4ch, 1dc in next lp; rep from to last 2dtr, 2ch, 1tr in the first 7ch lp.

12th row. (7ch, 1dc) in next 5 lps, 3ch, 1dtr in top of each dtr of last row leaving last lp of each on needle, yarn over hook pull through to form GR, 3ch, 1 GR in middle 2ch of 4ch lp, 2ch, 1GR in next 2dtr, 3ch, 1dc in next lp; rep from to last GR, 1tr in first 7ch lp.

13th row. (7ch, 1dc) in next 5 lps, 7ch, 1dc in top of first GR, (5ch, 1dc) in each of next 2GR; rep from to last 5ch, substitute for this 2ch, 1tr.

14th row. (7ch, 1dc) in each lp, ending 3ch, 1dtr in last lp.

15th row. 4ch, 5dtr in same lp, 1dc in next lp, (7ch, 1dc) in next 2 lps, 11dtr in next lp, 1dc in next lp; rep from to last lp, 5dtr in last lp, join with sl st to top of 4ch at beg.

Break off yarn and fasten off securely.

Join in variegated thread on which 12 beads have been threaded. Join should be at right of any fan.

16th row. 1dc in each of first 6dtr, 6ch, slide one bead over ch above 6th dtr, 1dc in same dtr, 1dc in each of next 5dtr, (1dc in dc, 7dc in lp) twice; rep from to end, join with sl st, fasten off.

Saucer detail

1st row. Join variegated cotton into foundation ring, work (1dc, 1ch) into every 2nd st, Join with sl st.

2nd row. Sl st nto first ch sp, 4ch (as dtr), 1dtr into same sp, 2dtr into each sp to end. Join with sl st.

3rd row. 3ch, miss next dtr, 1dc in next st, 2ch; rep from to end, sl st to join. Fasten off securely.

Cup detail

1st row. Join variegated thread in foundation row, work 1dc in every 2nd st, join with sl st.

2nd row. 3ch as first tr, 2tr into next dc, 1tr into next dc; rep from to end, sl st to join.

3rd row. 3ch as tr, 1tr in each tr; sl st to join.

4th and 5th rows. As 2nd and 3rd rows. Do not break off yarn.

Handle. 8ch, 1 sl st into side of Cup (2nd row), turn, 10dc into lp, sl st into 1st ch. Fasten off securely.

To finish. Coat Cup and Saucer with craft glue to stiffen and allow to dry using a plastic thimble to hold the cup to the desired shape.

General abbreviations

Bbl: bobble

beg: beginning

ch: chain

cont: continue

dc: double crochet

dtr: double treble

GR: group

lp: loop

rep: repeat

rnd: round

sl: slip

sp: space

st: stitch

tr: treble

Related stories


Advertisement
Home Page 5548

Cloth edging

Beautiful crocheted jug covers and cloth edges never go out of style. As we receive so many requests from readers for this style of project we thought it was time to run a lovely tea story from our archives. There is even a crochet jug cover that comes complete with it’s own teacup decoration!

Materials

Coats Mercer Cotton No.20 (quantity will depend on size of cloth) One 1.65mm crochet hook (or size needed to give correct tension) Firm cotton fabric to required size.

Measurements

Edging can be worked to any required width and length, but it may be necessary to work extra ch either side of dc to keep work flat.

Tension

20dc to 5cm when worked into fabric.

Edging

Fold a 50mm hem along four sides of cloth. Stitch hem neatly in place and press flat.

1st rnd. With right side of cloth facing and working over hemmed edge, insert 1.65mm hook into any corner, 1ch, work in dc over hem (placing approximately 20dc to each 5cm) along first side, 2dc in corner, then cont in this manner around cloth to end, finishing with 1dc in same sp as 1ch. Join with a sl st.

2nd rnd. 5ch, miss 2dc, 1tr in next dc, 2ch, miss 2dc, 1tr in next dc; rep from to end, join with sl st to 3rd of 5ch.

3rd rnd. 3ch, (1tr, 2ch, 2tr) in same sp, 4ch, miss one 2ch sp, (2tr, 2ch, 2tr) in next 2ch sp (called shell), 4ch, miss two 2ch sps, shell in next sp, rep from to to within one sp of next corner, 4ch, miss 1sp, shell in next sp, miss 1sp. Cont from to to next corner, turn corner with 1sp between shells and proceed in this manner to within 1sp of end, 4ch, join with sl st to top of 3ch.

4th rnd. Sl st to centre of first shell, work shell in centre of shell, 2ch, 1dc in 4ch sp, 2ch, shell in next shell, 2ch, 1dc in 4ch sp, 2ch, rep from to end, join with sl st.

5th rnd. Shell in shell, 2ch, 1dc in dc, 2ch; rep from to end, join with sl st.

6th rnd. Into first shell work 2tr, 5ch, sl st back into 4th of 5ch (picot formed), 1ch, 2tr in same shell, 3ch, 1dc in dc, 3ch; rep from to end, join with sl st. Fasten off.

General abbreviations

Bbl: bobble

beg: beginning

ch: chain

cont: continue

dc: double crochet

dtr: double treble

GR: group

lp: loop

rep: repeat

rnd: round

sl: slip

sp: space

st: stitch

tr: treble

Related stories


Advertisement
Home Page 5548

No worries

An american author weighs in on the laid-back aussie nature.

I thank the customs agent who has graciously allowed me to enter Australia.

“No worries,” he says.

This stops me for a second. It sounds as if he is absolving me from some sin rather than simply responding to my perfunctory gratitude.

In the cab, I ask the driver to take me to the W Sydney Hotel.

“That’s all right,” he says. “No worries.” I begin to suspect a pattern.

In fact, everyone I come across in Australia spouts the “no worries” mantra as if it were required by law. The phrase certainly gives the impression of being oh-so-laid-back, just like Australians are supposed to be, but I wondered if the stereotype was true, or if Aussies weren’t really Type-A-obsessive-compulsive-over-achievers. Maybe this cheery calm was just something trotted out for foreigners. I imagined Australians in their homes, sniping viciously at one another about dirty socks on the floor and crusty dishes in the sink.

Alas, after having spent two weeks in the country, I have concluded that the “no worries” attitude is not a farce, but rather, most of the time anyway, a way of life.

The first big test of the “no worries” attitude was at Harry’s Cafe de Wheels on Woolloomooloo Wharf (where most of the clientele, including myself, seemed exceptionally inebriated). I ordered a chicken and cheese pie, but became concerned when the clerk wielded a mammoth squeeze bottle and began to douse my pie with gelatinous white glop.

“Excuse me,” I said, trying not to grimace. “What’s that?”

“It’s the cheese, mate,” he said with a patient smile.

“That’s the cheese? Oh, no. No, I can’t eat cheese out of a bottle.”

“No worries,” he said. He dumped the pie in the bin and gave me another one, sans scary liquid cheese.

At Sydney’s stunning opera house the next night, I saw Rigoletto on opening night. My amazing seat was so close to the stage, I could see the pores on Rigoletto’s face, but the subtitles, which were flashed above the stage, were nearly impossible to read. Time and again, I swung my face upward, contorting my neck in an effort to decipher them. At one point, I accidentally head-butted the lovely woman to my left who bore a strong resemblance to Cherie Blair.

“I’m so sorry!” I whispered.

She glanced at me beatifically. “No worries.”

At Cargo Bar for post-opera drinks, I also noticed that the bartenders were unfailingly cheerful and able to take 10 drink orders at once, all the while, giving me a “no worries, mate” response when I didn’t have quite enough cash to cover the round. In the States, if you place a drink order of more than three cocktails at a time, the bartenders will often shoot you dagger looks and make you wait while they search for pen and paper.

The most extreme example of the laid-back Aussie way came when I decided to take a few friends skydiving. When I’ve jumped in the US, a two-hour training session is required, replete with video footage of someone being hauled away in an ambulance, as well as ominous warnings about how you may die a painful, albeit quick, death. But at Sydney Skydiving Centre, we were suited up and inside the plane within fifteen minutes of arriving there.

“Isn’t there anything else I should know?” I heard one of my buddies say to his tandem master after receiving a two-minute in-flight lesson on how to freefall from 14,000 feet.

“Ah, no worries,” the tandem master said.

A few short seconds later, my friend was hurtling out the yawning mouth of the plane.

The only area I discovered where Australians were decidedly not laid-back was politics. Everyone had an opinion about the potential war with Iraq, and, being an American, everyone decided to tell me that opinion. Whether I was shopping at Rundle Mall in Adelaide or having lunch at Iceberg Café in Bondi, the Australians I came across weighed in with their thoughts. One man I met in a pub in Paddington was particularly vociferous, becoming more and more agitated as he described the vendetta that George W was allegedly carrying for his father. He railed on about knowing your enemies; he huffed and puffed about North Korea being a bigger threat. At one point, as he accused all Americans of being oil-hungry mongers, his face turned a deep purple and his words reached the shriek level.

But suddenly he stopped. “Sorry,” he said blinking, his face returning to a normal color. “I was getting a bit carried away.”

I smiled and patted his hand. “No worries,” I said.

I was starting to get the hang of it.

**Laura Caldwell is an Adjunct Professor at Loyola University Chicago School of Law and contributing editor of Lake Magazine. She is also acting as the Editor in Chief of a new medical/legal text book.

Laura is the author of Burning the Map (Red Dress Ink) which is available in bookstores everywhere. Her second book A Clean Slate will be published by Red Dress Ink in December 2003.**

Related stories


Advertisement
Home Page 5548

Cube shade

NOTE: To ensure safety, use only 25W light globes in each of the lamps featured here.

Materials

Newspaper

Cube shapes wire frame (available at selected craft and hobby stores)

Japanese handmade paper

Scissors

Craft glue

Blunt knife

Step 1

Make a newspaper template of half of the lamp frame, allowing an extra 2cm along both long edges and one short edge. To make the template, place one side of the wire frame onto the paper then gently roll the frame to the next side (this is half of the frame), Now, using this template, cut two Japanese handmade paper panels for the lampshade.

Step 2

Apply a thin line of craft glue along the edge of one long upright. Press the corresponding edge of the paper in place with the 2cm allowance in place, then fold this overlap to the inside of the shade and tuck in the ends using a blunt knife. Attach the other two sides with allowances in the same way and leave the final side free. Repeat to attach the other paper panel, attaching the short edge with the allowance to the upright, underneath the free short edge of the previous panel. Finally, apply a line of glue under each free short edge and press each one firmly in place. Allow to dry.

Credit: Lampshades designed and made by Ivana Perkins

Related stories


Advertisement
Home Page 5548

March 2003 book reviews

Angel On My Shoulder – An Autobiography

by Natalie Cole, (written with Digby Diehl), Warner Books, $19.95.

The Grammy Award-winning singer and daughter of the legendary Nat King Cole dishes up her amazing life story with honesty and bravura. Told in straightforward and simple prose, Cole resembles a prize fighter the way she manages to bounce back after any number of knock-out crises – drugs, estranged mother, family fights over money, abuse, marriage break-ups. Fast-moving and entertaining, it’s all there, if a bit religious at times.

Nutmeg by Kristin Valla, Weidenfeld and Nicolson, $27.95.

In a small town in the Andes, Klara forms a relationship with a college professor, Gabriel, who for the first time in his life finds a woman to love. Torn between the inspiration for her life that he gives her and William, her lover, Klara has to accept that the love of your life is not always the person with whom you could live – and the person with whom you live happily, may not be the love of your life. Touching and truthful.

The Pirate Queen

by Alan Gold, HarperCollins, $18.95.

It is the middle of the 16th century. A strong woman leads her people, winning the love, respect and admiration of the men who serve her. Yes, this could be England’s Queen Elizabeth I, but it also applies to the infamous Grace O’Malley, an Irish pirate and patriot, whose life and loves come vibrantly alive in these absorbing pages. Her exploits challenged Elizabeth’s golden age, until the feud between them ended in friendship.

lazy ways to make a living

by Abigail Bosanko, Time Warner, $22.95

Read this over the holidays and loved it for its engaging characters and zingy writing style. Rose Budleigh is the failed sister, whose Ph.D. in lexicography and talent for chess pales alongside the achievements of her sisters, Catherine (the clever one) and Helen (the pretty one). Rose is scraping a living when she meets her match – a chess rival from her teenage years who is good looking and fabulously wealthy. He makes her an offer – he’ll provide her with every luxury in life in return for her chess skills and love. From then on, every move they make counts.

I’m Not Scared

by Niccolo Ammaniti, Penguin, $23.00.

Read this over the holidays as well and couldn’t put it down. A marvellously gripping tale about a small boy who stumbles across a dark and sinister secret that begins to take over his life. Set in a small Italian village during a sizzling summer, this charming story brings back the joys and tortures of childhood, has a lot of suspense and a great twist towards the end that didn’t occur to me for one moment.

The Bone Vault

by Linda Fairstein, Little Brown, $29.95.

History and mystery intermingle in this latest Alex Cooper thriller. Alex is attending a glitzy reception at New York’s Metropolitan Museum of Art when a gruesome discovery is made of the body of a young woman in an ancient sarcophagus bound for a show abroad. The cause of death is an unusual one – arsenic poisoning. The investigation leads Alex and NYPD detective Mike Chapman into another world and makes for an engrossing read. For those previously disappointed with Fairstein, she is back in good form with this one.

Sacking The Stork

by Kristin Webb and Kathy Wilson, Macmillan, $30.

Sophie loves cocktails and stilettos, her lover Max and her life in general. Then she finds herself pregnant and everything changes. Max scarpers to the US and Sophie is left literally holding the baby, in turn supported by a bunch of unlikely friends who see her through the first lonely, difficult months of single motherhood. Then along comes a new business venture – and a new man. An entertaining, thoroughly enjoyable read, with warm characters and pep in the writing and the plot.

Related stories


Advertisement
Home Page 5548

No worries

Worrying thoughts drive the vicious circle of anxiety. With every worrying thought, anxiety rises a little more. Challenging such thoughts enables you to jump out of the vicious circle and stop anxiety rising.

As we’ve seen, worrying thoughts can be challenged with three questions:

  • What is the evidence for what I thought?

  • What is the effect of thinking the way I do?

  • What alternatives are there to what I thought?

+

Before challenging your own worries with these three questions, practise working through the following examples.

Challenge each worry by writing a more helpful response in the space provided. (Use a separate sheet of paper if you need more space.)

After you have written your answers, compare them with these possible responses.

Related stories


Advertisement